How to Install and Set Up Express & Creating a Basic Web Server
Installing Express.js
Before setting up an Express server, you need to install Node.js on your system. If you haven't installed it yet, download and install it from nodejs.org.
Step 1: Initialize a New Node.js Project
To start, create a new folder for your project and navigate to it in your terminal
Next, Initialize a Node.js project by running: This will generate apackage.json file that manages your project's dependencies.
Step 2: Install Express
Now, Install Express by running:
This command will download and save Express in your project's dependencies.
Creating a Basic Express Server 
Once Express is installed, you can create a basic web server.
Step 1: Create a Server File
Inside your project folder, create a new file called server.js and open it in your code editor.
Step 2: Write Basic Express Code
In server.js, add the following code:
const express = require("express"); // Import Express
const app = express(); // Create an Express app

// Define a basic route
app.get("/", (req, res) => {
    res.send("Hello, Express!");
});

// Start the server on port 3000
app.listen(3000, () => {
    console.log("Server is running on http://localhost:3000");
});
Tip
Always use req and res instead of request and response for cleaner and more standard code.
Step 3: Run the Server
Save the file and run the following command in your terminal:
Success
If everything is set up correctly, you should see the message on console:
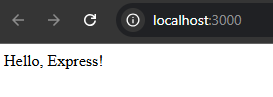
Now open your browser and go to http://localhost:3000. You should see the text "Hello, Express!" displayed on the page. 
Example

Success
If you've followed all the steps correctly, you should see "Hello, Express!" in your browser.
This page covers the essential first steps to setting up an Express app.
Example